Skip to content
English
  • There are no suggestions because the search field is empty.

Configuration for Xirrus (Enterprise) Gateway Equipment

NOTE: Xirrus Speed (Upload/Download) and Session Time controls will need to be setup within the Xirrus equipment. Screen

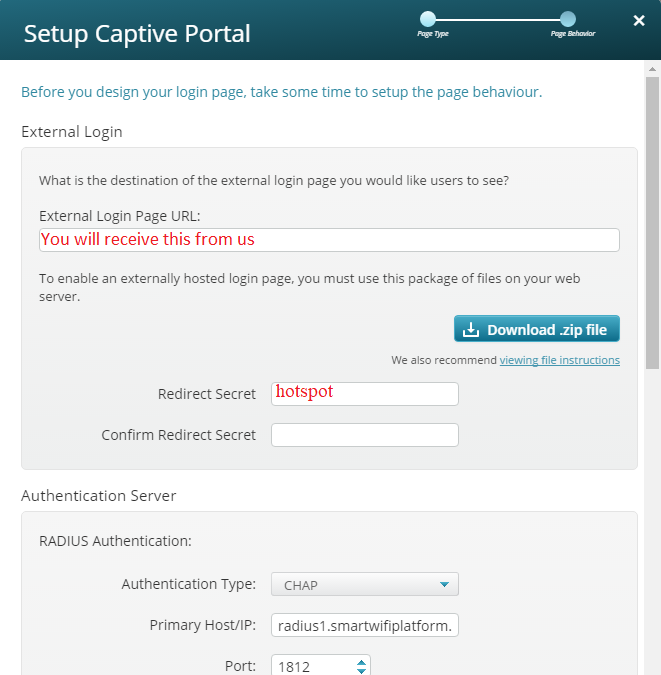
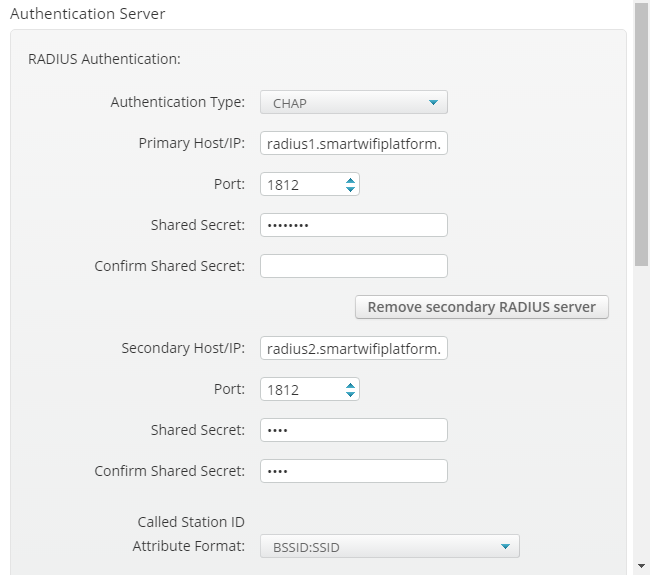
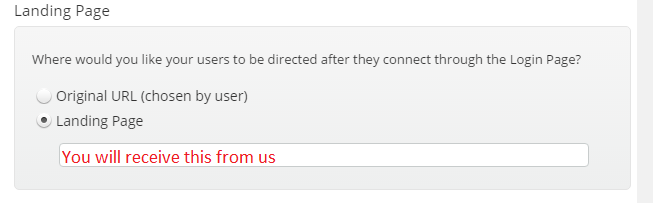
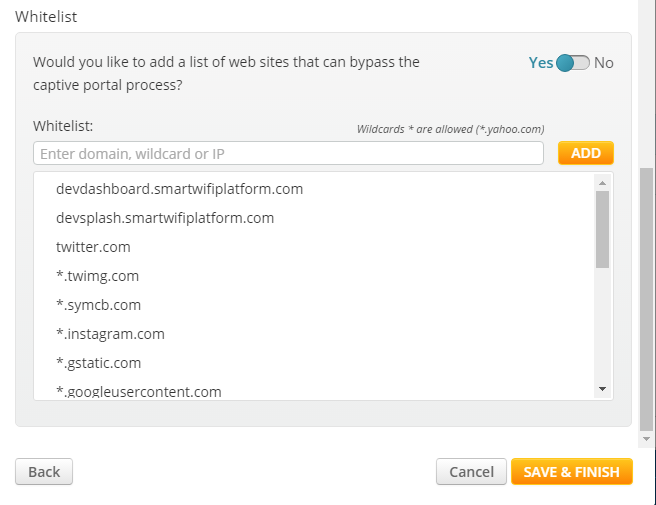
NOTE: Xirrus Speed (Upload/Download) and Session Time controls will need to be setup within the Xirrus equipment. Screenshots of Xirrus Dashboard configuration:
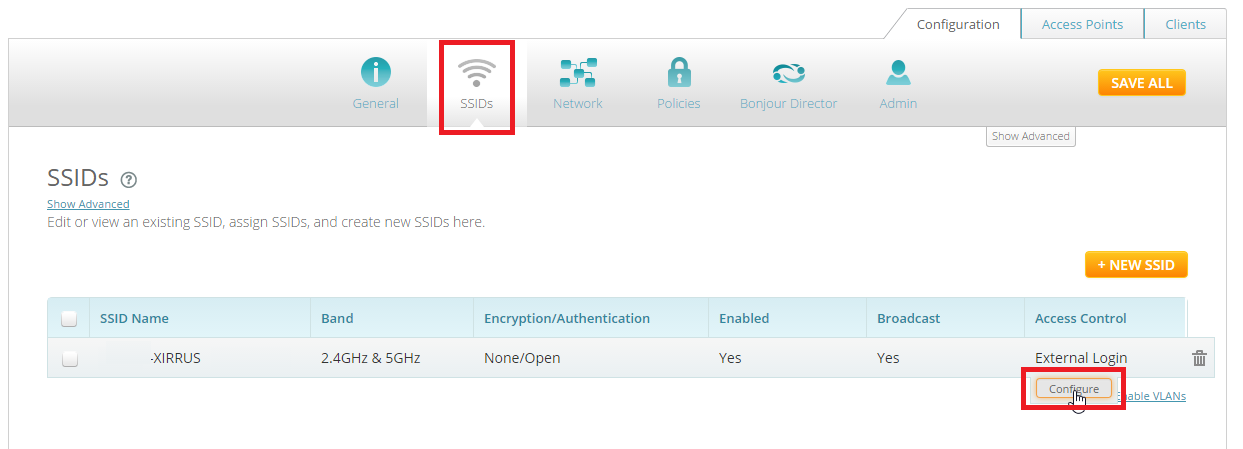
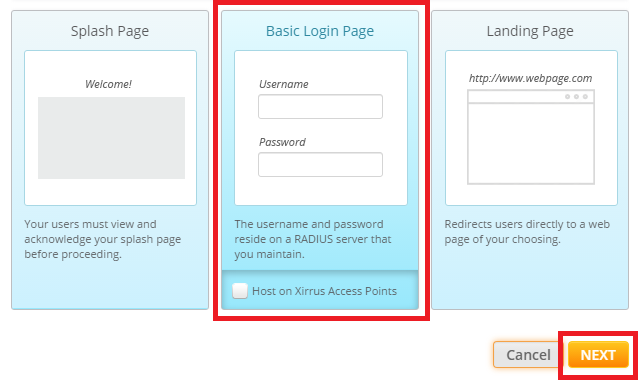
Settings: External Login Page URL: You will receive this from us Redirect Secret: hotspot Authentication Type: CHAP Primary Host/IP: radius1.smartwifiplatform.com Port:1812 Shared Secret:You will receive this from us Add a secondary Radius Server Secondary Host/IP: radius2.smartwifiplatform.com Port:1812 Shared Secret:You will receive this from us Landing Page: You will receive this from us Please use the wildcard walled garden entries for the white list found  HERE. You will also need to configure RADIUS ACCOUNTING on the Xirrus device directly: While in the Profile click on the “Show Advanced”

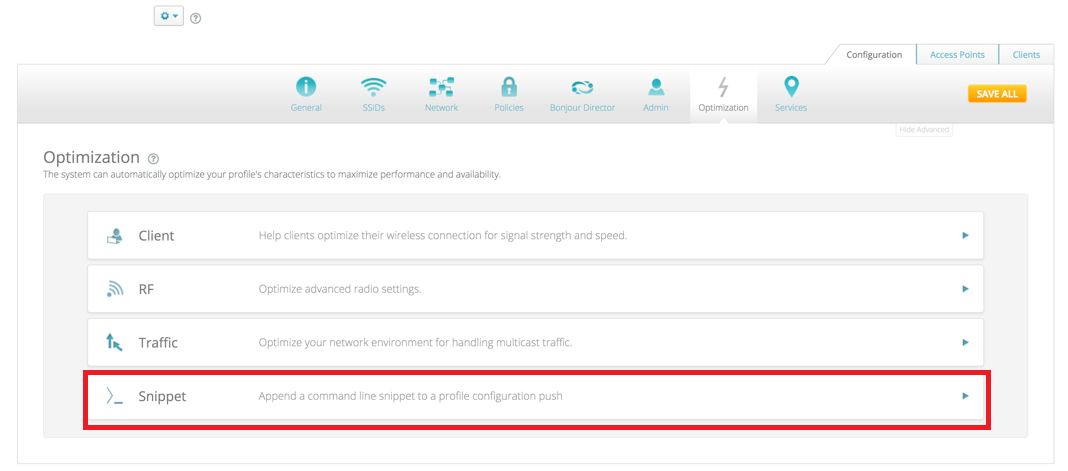
After you hit “Show Advanced” you should see a couple extra buttons:

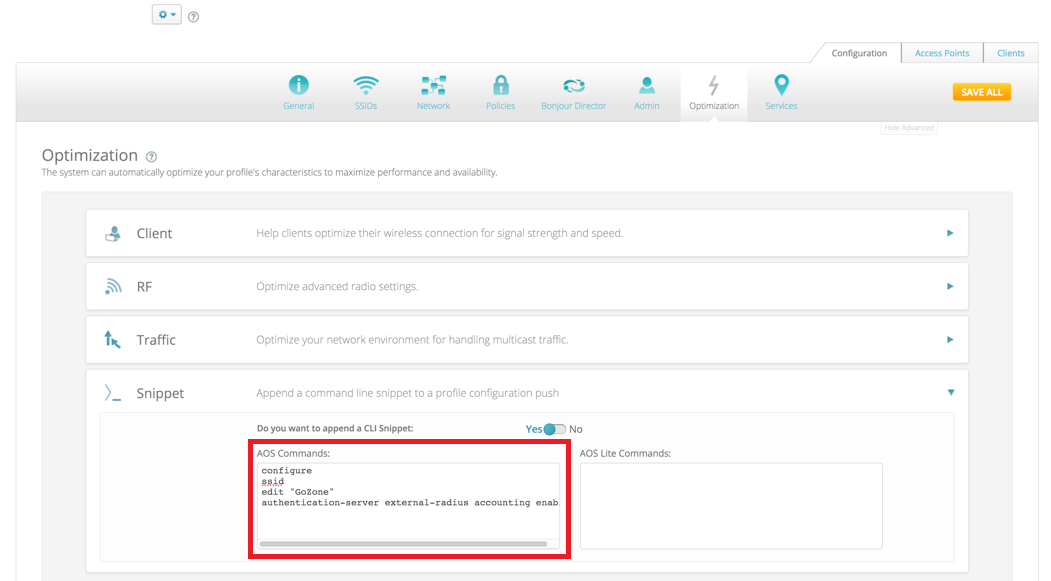
Select “Optimization” and then click “Snippets” and agree to the following notices:

Inside the text box for AOS enter the following code to enable RADIUS Accounting:

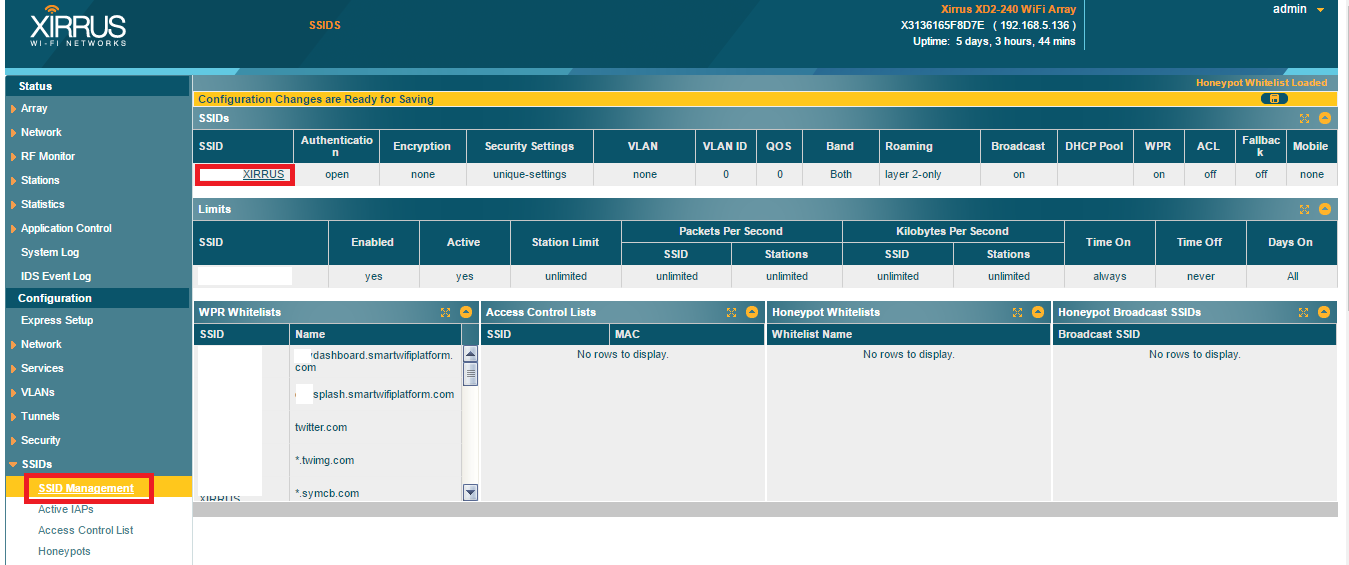
configure ssid edit "SmartWiFi" authentication-server external-radius accounting enable ***Note that by default Xirrus uses port 1813 when accounting is enabled so there is no need to enter it with the first code Snippet*** configure ssid edit "SmartWiFi" authentication-server external-radius accounting primary port 1813 authentication-server external-radius accounting enable Finally, hit “Save All” and the configuration will be sent to all the Aps associated to this profile.     Use the same RADIUS server address above BUT the accounting port for both servers is 1813 If your login does not log into the Dashboard then you may need to manually enable the radius account. Login to the AP itself using the web interface. Then go to SSID>SSID Managament

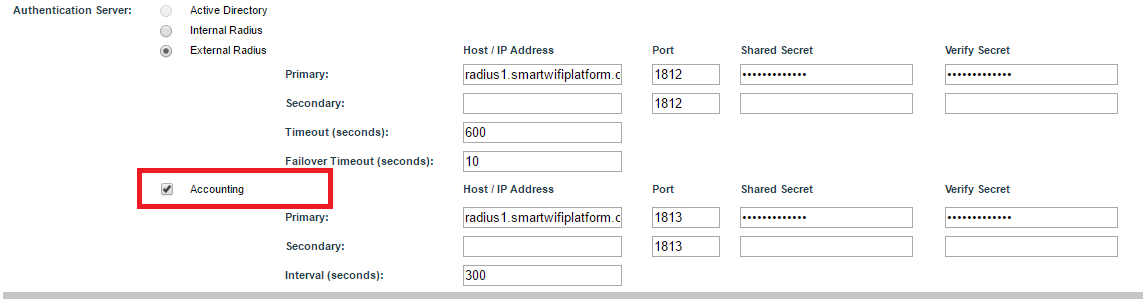
Choose the correct SSID that you are configuring and click on it. Scroll to the RADIUS area and tick to enable 'Accounting'. Be sure the shared secret matches what was supplied to you. (case sensitive).

Save the configuration. LIMITED HARDWARE SUPPORT: Hardware manufacturers frequently make changes to firmware, controllers and GUI’s. The information below may be out of date or images may be different and is to be used as a general reference guide. We do offer additional limited support to help with trouble-shooting and we highly recommend that you have a hardware support agreement and/or access to a hardware support engineering representative from the manufacturer.