
Confirming Platform Details
Before proceeding with the configuration guide please complete the following steps so you have the required information to complete the guide.
- Login to your Marketing4WiFi dashboard
- Using the navigation panel to the left, select Settings ➡️ Customizations
- Splashpage hostname: Find your splashpage hostname and save it for use later in this guide.
- Platform Environment: Find your environment and then use the table below to determine your RADIUS Servers for use later in this guide.
Environment RADIUS Server 1 RADIUS Server 2 US-A 52.23.46.139 52.207.192.243 US-B 3.132.31.3 3.18.137.68
- Using the navigation panel to the left select Network ➡️ Hotspots
- Click the Edit icon for the hotspot you wish to configure using this guide.
- Scroll to the bottom of the page to find the Gateway Details section.
- NAS-ID: Save this for use later in this guide.
- RADIUS Secret: Save this for use later in this guide.
The following instructions outline how to setup a Everest Networks Basecamp network for the Marketing4WiFi Platform. This guide covers details such as configuring RADIUS, walled garden entries, and captive portals. This guide assumes that your Basecamp controller is already operational and on a live network with adopted Access Points. Please make sure any firewall rules, web content filters, and other security measures have been configured to interface with the platform. Log in to your Everest Basecamp controller.
Adding Gateways to your Hotspot
- Login to your GoZone Marketing4WiFi dashboard
- Using the navigation panel to the left, select Network ➡️ Gateways
- Click the Add Gateway option to the top right
- Select Hotspot: Select your desired hotspot
- Gateway Name: Enter any name for this gateway
- Gateway Type: Cisco Mearki
- MAC Address: Enter the MAC of any AP that will broadcast the Guest WiFi
- Press Submit
- This completes the Gateway creation portion of this guide
- Click Wireless Networks, then in the top right click Add.
- Network Name: Smart WiFi
- SSID: Guest WiFi (Or whatever you wish)
Please avoid special characters as they may impact Splash page presentation and authentication. - Security: Open
- Captive Portal Enabled: Yes
- Splash URL: Enter the Splashpage hostname collected during the Confirming Platform details section of this guide and then add /hotspotlogin.php
- Integrator: Third Party
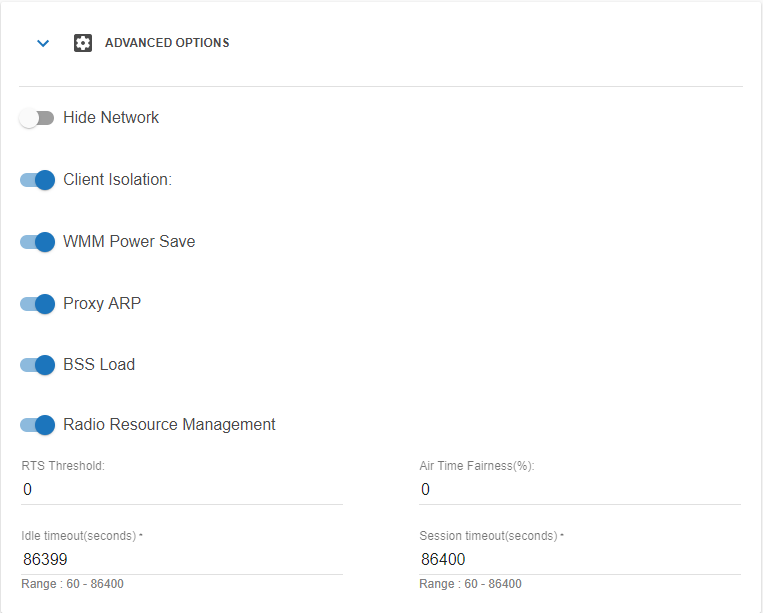
- Advanced options-
- Client Isolation: Enabled
- Idle Timeout: 86399
- Session Timeout: 86400
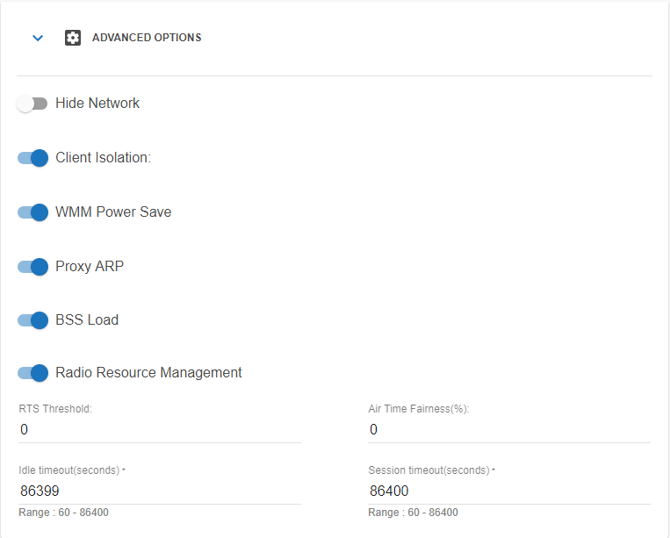
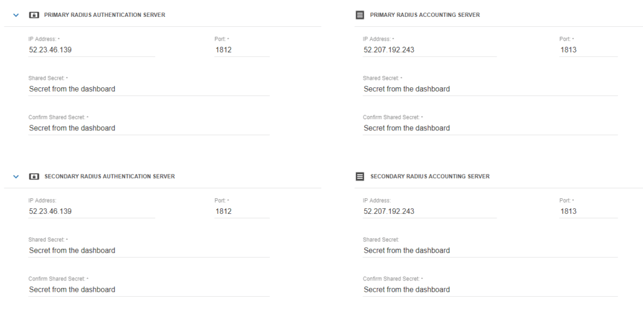
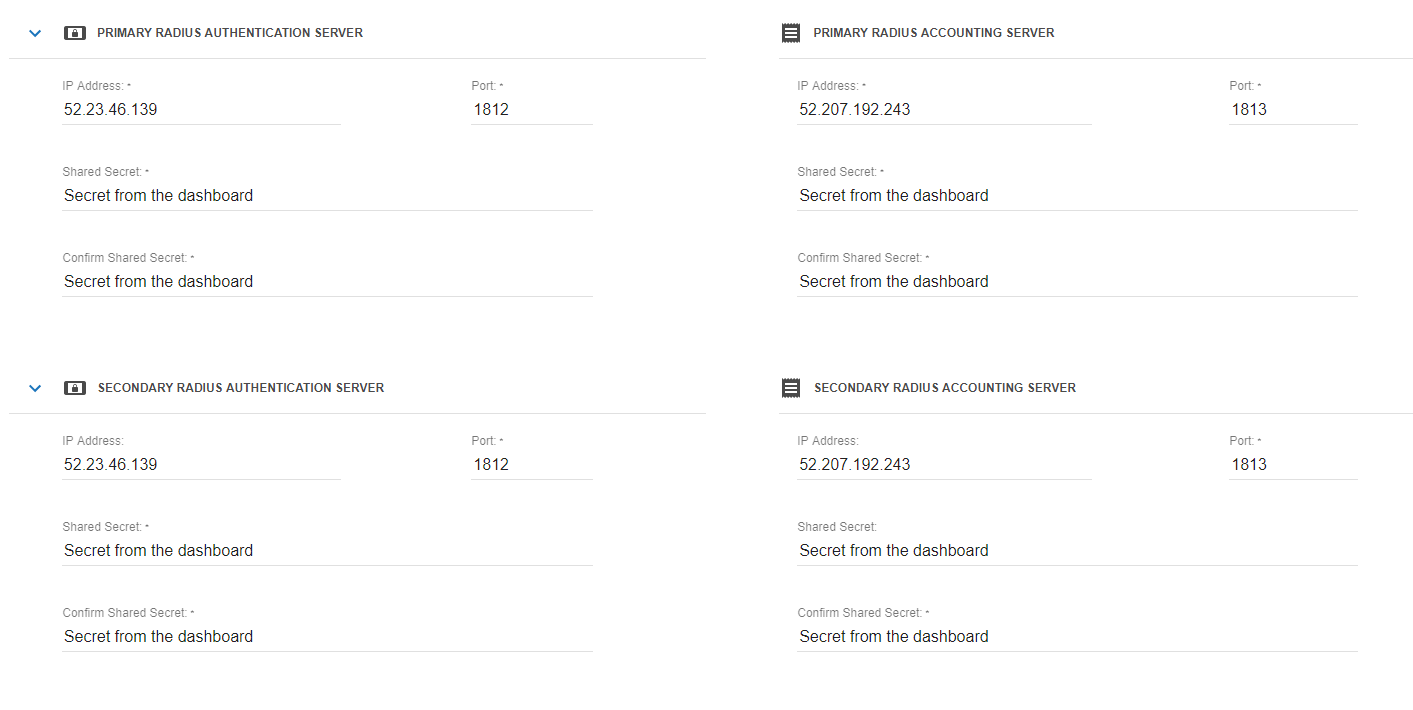
- Primary Radius Authentication Server
- IP Address: Enter your RADIUS Server 1 from the Confirming Platform Details portion of this guide.
- Port: 1812
- Shared Secret: Enter your RADIUS Secret from the Confirming Platform Details portion of this guide.
- Confirm Shared Secret: Enter your RADIUS Secret from the Confirming Platform Details portion of this guide.
- Primary Radius Accounting Server
- IP Address:
Enter your RADIUS Server 1 from the Confirming Platform Details portion of this guide. - Port: 1813
- Shared Secret: Enter your RADIUS Secret from the Confirming Platform Details portion of this guide.
- Confirm Shared Secret: Enter your RADIUS Secret from the Confirming Platform Details portion of this guide.
- IP Address:
- Secondary Radius Authentication Server
- IP Address: Enter your RADIUS Server 2 from the Confirming Platform Details portion of this guide.
- Port: 1812
- Shared Secret: Enter your RADIUS Secret from the Confirming Platform Details portion of this guide.
- Confirm Shared Secret: Enter your RADIUS Secret from the Confirming Platform Details portion of this guide.
- Secondary Radius Accounting Server
- IP Address: Enter your RADIUS Server 2 from the Confirming Platform Details portion of this guide.
- Port: 1813
- Shared Secret: Enter your RADIUS Secret from the Confirming Platform Details portion of this guide.
- Confirm Shared Secret: Enter your RADIUS Secret from the Confirming Platform Details portion of this guide.
- Save the network.
- Click Wireless Networks, then in the top right click Walled Garden. Add each of the wildcard walled garden entries found in the Default Walled Garden list as a Domain.
- Click Wireless Networks, then click the Smart WiFi network you just created, select the AP's you wish to use with this configuration and then click Apply to APs.
Hardware dependent features
- This integration does not supports the platform’s Session Profile values for Download/Upload speed. This means bandwidth throttling is not set by the platform when a guest connects to a hotspot using any login method, including Guest Plans and Ad-Based.
- This integration does not support Presence/Proximity data. This means Presence Campaigns can not be configured for a hotspot utilizing this hardware.
- This integration does not supports the SecurePass™ module. This means a hotspot utilizing this hardware can not provide dynamically generated wifi passwords to guests who purchase a Guest Plan.
- This integration utilizes an HTTP post to initiate authentication by default. This means devices interacting with the splash page on a full feature browser will likely be displayed an HTTP Browser Post warning after clicking the connect button.
Troubleshooting Tips
- If a hotspot deactivated message is presented please ensure all the AP MACs have been added as gateways to the correct hotspot.
- If devices are redirected to the splash page URL but the page fails to load please ensure the Address Group has been correctly configured and assigned to the Pass Networks option.
- If devices are redirected back to the splash page after pressing the connect button please ensure you have entered the correct RADIUS details.
LIMITED HARDWARE SUPPORT: Hardware manufacturers frequently make changes to firmware, controllers and GUI’s. The information below may be out of date or images may be different and is to be used as a general reference guide. We do offer additional limited support to help with trouble-shooting and we highly recommend that you have a hardware support agreement and/or access to a hardware support engineering representative from the manufacturer.
This equipment has been integrated and tested in our labs with the Marketing4WiFi platform using the firmware versions below.
-
BaseCamp Version: 3.0.0 Build: 36 AC Version: 3.0.0
-
AP Version: 3.0.0
-